In this post, you’ll learn the steps on how to setup AVOV TV Online for IPTV or to watch streaming content on the device.
The AVOV TVOnline is an IPTV set-top box that supports 4K UHD streaming. The AVOV TVOnline is an Android-powered IPTV box that runs Android 5.1 and is designed with AVOV’s latest middleware called Nova2.
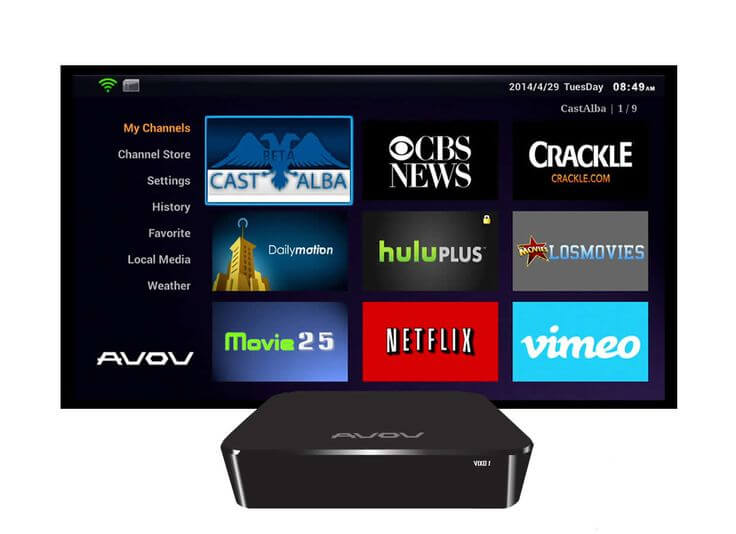
The middleware isn’t quite flawless for streaming online internet content, but it is a decent option for viewing your IPTV and video-on-demand movies and TV shows.
Initial Setup of Avov Box
Before we begin with the setup to configure your Avov TVOnline box, you need to do the following steps so that your device responds correctly and is properly setup for the connection and view your video contents.
Power connection to your Avov device
Ensure that you have correctly connected the power supply to your device. If you have connected the wrong power source, your Avov box may not respond.
To easily solve this issue, connect your power cord and the HDMI cable with your Avov streaming box to your TV and your power source. This will automatically turn on your box which you can see on your TV.
The screen shows pairing LED lights that include the red and blue lights on the front of the box and the logo of the device appears on the device, showing that it is powered on.
Connection to WiFi and Internet on Avov Box
Ensure that your device has a connection to the internet through WiFi or if your device comes with support for ethernet, you can also add an internet cable to your device.
If you wish to know how to setup the internet on your Avov box, read the following paragraph or you can skip and proceed to the next point.
To connect over the wireless network or Wifi on your Avov Box, go to Settings and select the Wifi menu option. You will get various options to configure your wireless network. Select your WiFi name and enter your Wifi password to connect your device with the internet.
The device will show a tick sign next to your wifi name, indicating that the device is connected to the internet.
If the internet connection fails for your Avov device, just unplug your wireless router or turn it off and then turn on your wifi hotspot and then connect again.
This time you do not need to enter the password in your Avov device. The internet network will surely work on your device.
Adjust your Time Zone
This is a VERY IMPORTANT step to ensure that the TV guide information matches your Avov’s time settings.
To set your time zone, go to Setting and then select the Time option and finally select your time zone from the time zone available in the list. You can also consult with your IPTV provider to decide the right time zone for your device and service.
Adjust your Language
Primarily Avov Set-top box comes with the default English language and if you wish to reset the language of your choice, go to Setting and then select the Language option. Finally, select the language from the list using your remote. The device will automatically translate the UI names in your desired language.
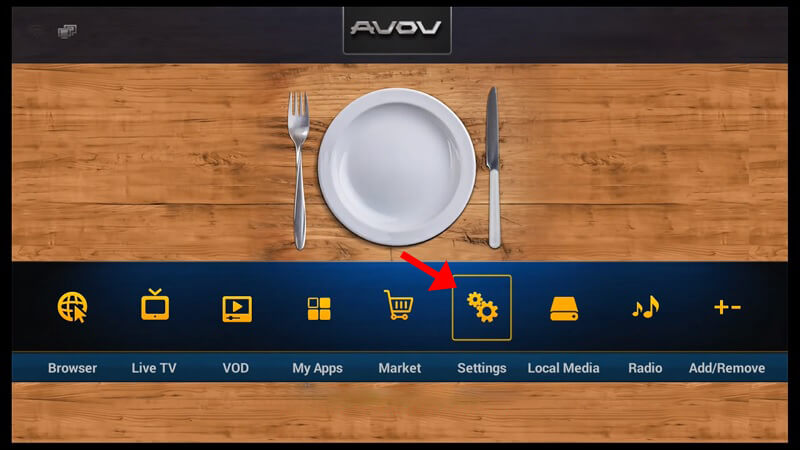
How to Setup AVOV TV Online and Add IPTV Channels
This section talks about the steps on how to setup Avov TVOnline using the m3u playlist option or using the MAC ID setup, the same steps that you can do with a stalker portal.
Avov IPTV device allows you to setup IPTV up to 10 servers, even though the setup is easy, but we do recommend the MAG boxes as they are natively made to support IPTV through the MAC ID and portal URL support.
In this section, you’ll learn the steps to configure your Avov TV box to receive IPTV channels from your provider through the TVOnline app.
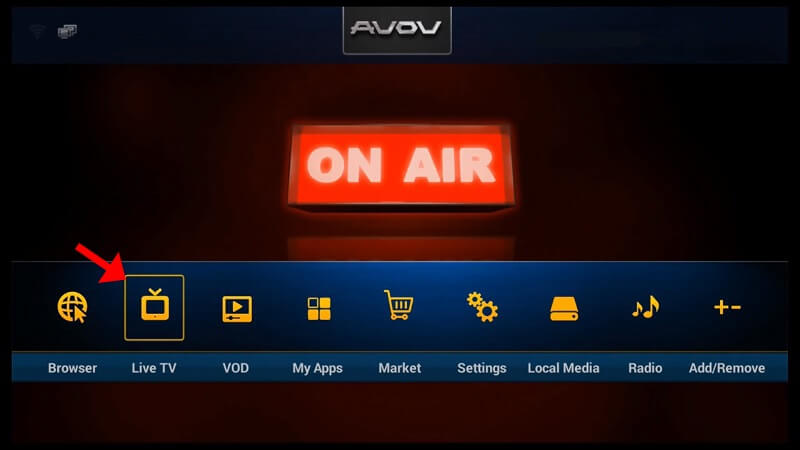
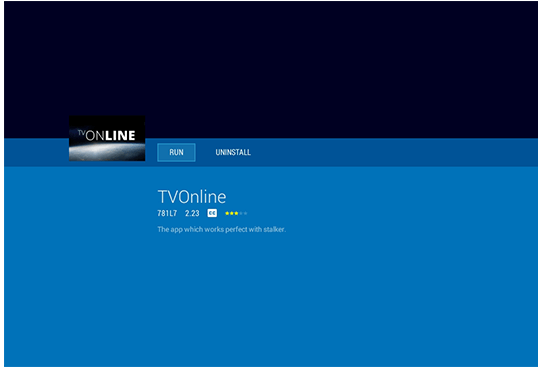
- By default the Avov TV comes with a TVOnline app. You can see the Live TV icon that indicates that the TVOnline app is already installed for you. If the TVOnline is installed on your device, you can ignore the below step and move to step number 3.
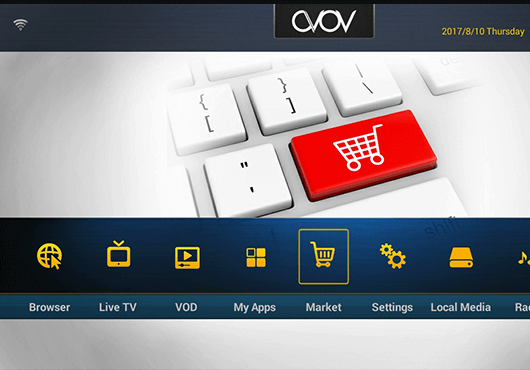
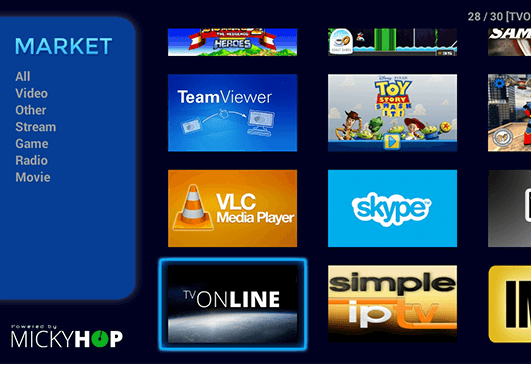
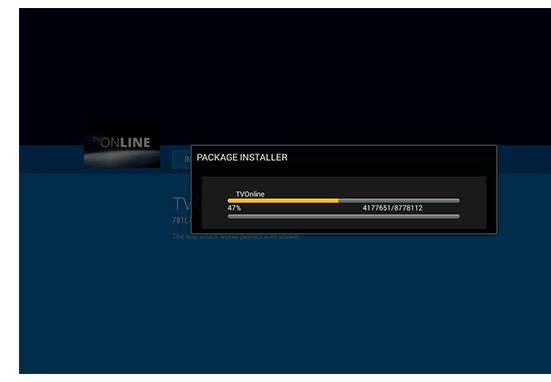
- On the Avov home screen select Market. Next, select the TvOnline app that you see on the list. Begin the installation process for the TVOnline app. Keep selecting the Next screen and wait for the Avov device to install the app.
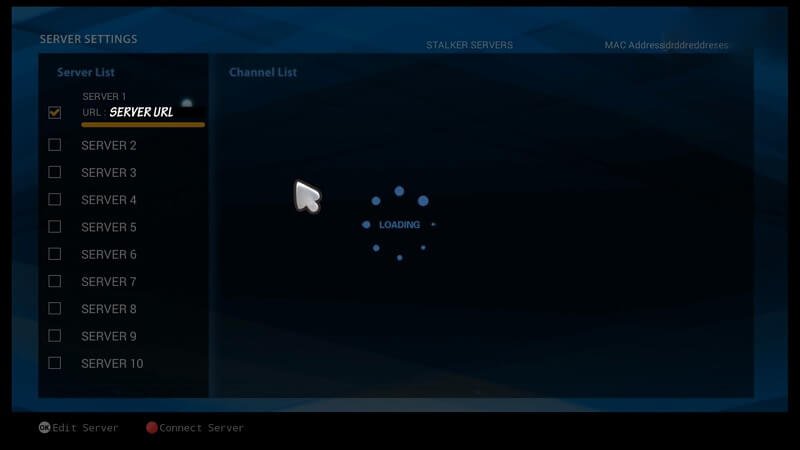
- Click the Live TV icon. If you doing the setup for the first time, when you select the Live TV icon, you will be redirected to the Server settings.
- If the server settings do not open, go to Settings and select the Server Settings.
- Here you will find the option to setup the portal URL and your MAC ID, along with your devices serial number. You need to provide this MAC ID to your IPTV Provider who will setup your device with their service and provide you with a portal URL to connect and watch live tv services.
- Once your MAC ID is configured and added to the IPTV providers server, enter the portal URL in the Server 1 slot, and then click connect.
- If your IPTV provider does not support MAC ID, then you can also configure using the Xtreme UI option and setup the Avov box with the m3u option. Click Use Credentials, You can add your username, password and URL. Click Connect.


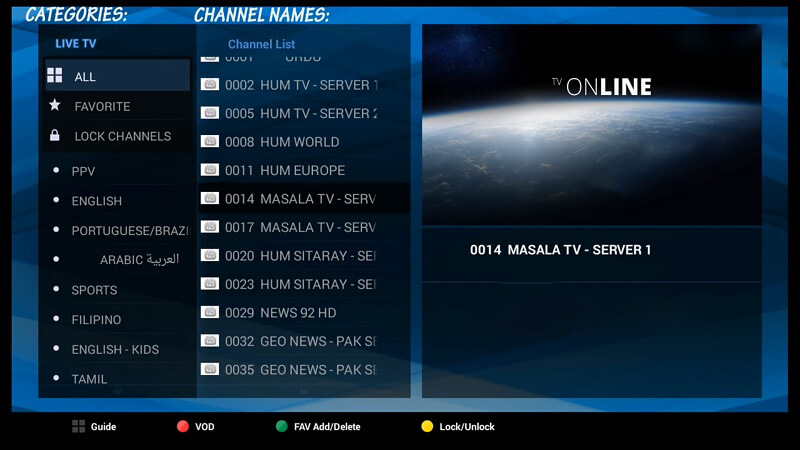
If everything goes right, you can then click the Live TV icon again and this time the channels will start to load based on the IPTV setup by your IPTV provider for your device. You can view different categories grouped for the channel list.
You can also click the Movies option to view the video on-demand content for your device.
With this, we have successfully seen how to setup Avov TV Online for IPTV channels, which is the popular streaming devices in Canada in today’s time.
Do remember to read about various IPTV service, before making the decision to pick the one for your needs.